
How to Grow Cress from Seed
Cress is a fast-growing, nutrient-rich herb that adds a peppery zest to salads, sandwiches, and soups. Whether you choose to grow garden cress (Lepidium sativum) or opt for watercress (a related, aquatic variety), this guide will help you achieve a healthy, continuous crop. Cress is ideal for beginners due to its rapid germination and minimal care requirements.
Introduction to Cress
Cress is an annual herb that germinates quickly—often within 3–5 days—and is ready for harvest in as little as 7–10 days if you prefer a delicate, baby leaf crop. Its crisp, slightly spicy flavour makes it a popular garnish and salad addition. Because cress can be grown in small spaces or even in containers, it’s a perfect choice for urban gardeners and those with limited garden space.
Choosing the Right Variety
There are a couple of popular varieties to consider:
- Garden Cress (Lepidium sativum): This variety is well-known for its fast growth and peppery taste, ideal for sprinkling over salads or mixing into sandwiches.
- Watercress (Nasturtium officinale): Although technically different, watercress is related and is typically grown in water or very moist conditions. It has a milder flavour and is often used in soups and as a garnish.
For most home gardeners, garden cress is the simplest and most straightforward option, while watercress requires a wetter environment.
Preparing the Growing Area
Cress thrives in moist, well-drained conditions and does not demand highly fertile soil.
-
Soil and Containers:
- If growing garden cress in the ground, choose a sheltered spot with light, loamy soil. Loosen the soil to a depth of about 10–15 cm and mix in some compost if needed.
- For container growing, use a shallow tray or pot with good drainage. A quality multipurpose compost works well.
-
Moisture Requirements:
- Cress requires consistent moisture for optimal growth. Ensure the growing medium is kept damp but not waterlogged.
-
Lighting:
- Place your cress in a sunny position or, if indoors, on a bright windowsill. Although cress grows quickly, it benefits from at least 4–6 hours of sunlight daily.
Sowing and Planting Cress
Cress is best grown from seed, as it germinates extremely quickly and is sensitive to transplanting.
-
Sowing:
- Scatter the seeds thinly over the prepared soil or container surface. Because cress seeds are tiny, a light, even distribution is key.
- Gently press the seeds into the surface without covering them completely, as they require light to germinate.
-
Watering After Sowing:
- Mist the area lightly with water to ensure the seeds remain moist. A fine spray bottle works well to avoid washing away the seeds.
-
Germination:
- Expect germination to occur within 3–5 days under optimal conditions. Once the seeds have sprouted, continue to keep the soil consistently moist.
Caring for Cress
Cress is a low-maintenance crop, but a few simple care tips will ensure a robust harvest.
-
Watering:
- Maintain consistent moisture by watering gently and regularly. Avoid letting the soil dry out, as this can slow growth or cause wilting.
-
Weeding:
- Cress grows rapidly, so it’s important to remove any competing weeds that may appear, especially in a garden bed.
-
Temperature:
- While cress grows well in cooler conditions, avoid extreme cold. If grown indoors or in a controlled environment, maintain a temperature of around 15–20°C for best results.
Harvesting and Storing Cress
Because cress grows so quickly, you can enjoy multiple harvests throughout its short cycle.
-
When to Harvest:
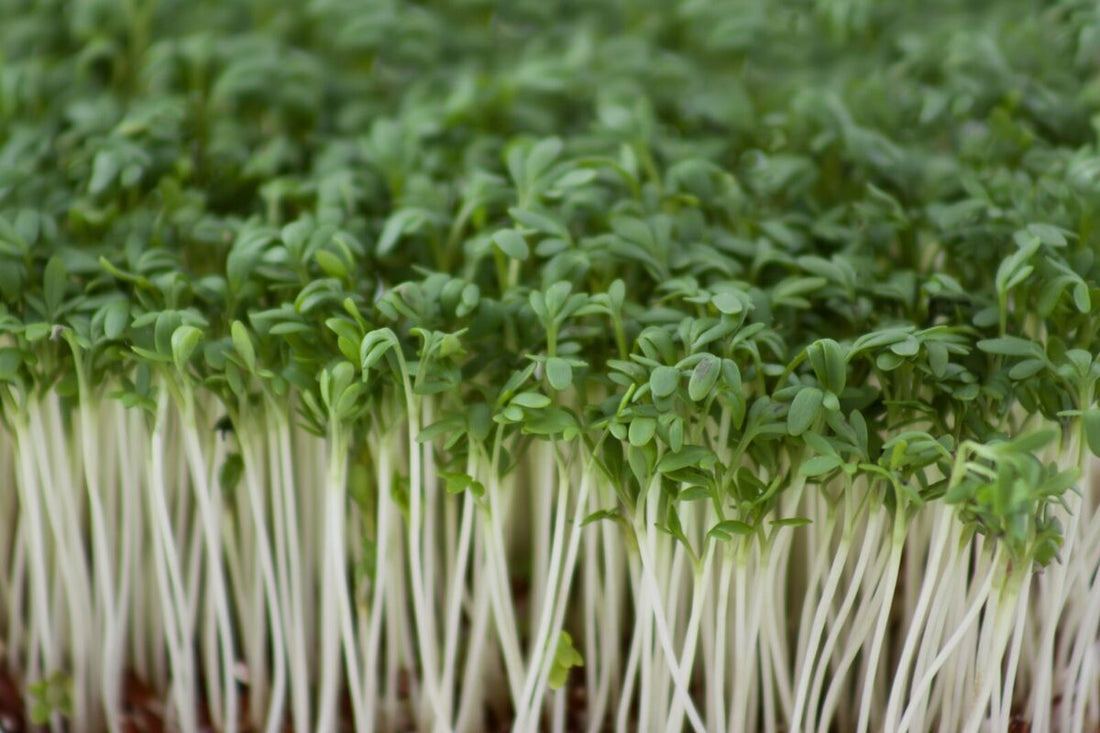
- Harvest baby cress leaves once they reach about 5–10 cm in height, which is typically around 7–10 days after sowing.
- For a slightly more mature crop, wait an extra few days. However, older leaves can develop a stronger, sometimes bitter taste.
-
How to Harvest:
- Use scissors or simply pinch off the leaves gently, taking care not to disturb the remaining plants.
- Harvest regularly to encourage continuous new growth.
-
Storing:
- Fresh cress is best enjoyed immediately. If needed, store in a loosely closed bag in the refrigerator for up to 2 days. Avoid washing the leaves until just before use to prevent premature spoilage.
Common Problems and Solutions
While cress is generally trouble-free, here are a few common issues and their remedies:
-
Overdrying:
Cress requires constant moisture. If the leaves start to wilt, increase watering frequency and ensure your growing medium retains moisture. -
Crowding:
Over-sowing can lead to overcrowded plants, which may stunt growth. If necessary, thin out the seedlings to allow adequate space for each plant. -
Weed Competition:
Remove weeds promptly, as cress’s rapid growth can be hindered by competing plants.
Frequently Asked Questions
Q: Can I grow cress indoors?
A: Yes, cress grows exceptionally well indoors on a sunny windowsill or under a grow light.
Q: How long does it take for cress to be ready to harvest?
A: Garden cress typically germinates within 3–5 days and is ready to harvest in about 7–10 days for baby leaves.
Q: Can I sow cress multiple times?
A: Absolutely. Due to its rapid growth, you can sow seeds in small batches every couple of weeks to ensure a continuous supply.
Summary and Final Tips
Cress is an ideal crop for those seeking a quick and nutritious addition to their meals. To summarise:
- Choose a well-drained, moist growing medium and a bright, sunny location.
- Sow seeds thinly, as they require light for germination, and keep the soil consistently moist.
- Harvest baby leaves within 7–10 days to enjoy their fresh, peppery flavour.
- Regular sowing can provide a continuous crop throughout the growing season.
For further guidance, check out resources from the Royal Horticultural Society or herb gardening books such as Grow Your Own Herbs. With minimal effort, you can enjoy fresh, crisp cress to enhance your salads and sandwiches all year round. Happy growing!